This article is more than one year old. Older articles may contain outdated content. Check that the information in the page has not become incorrect since its publication.
WSL+Docker: Kubernetes on the Windows Desktop
Introduction
New to Windows 10 and WSL2, or new to Docker and Kubernetes? Welcome to this blog post where we will install from scratch Kubernetes in Docker KinD and Minikube.
Why Kubernetes on Windows?
For the last few years, Kubernetes became a de-facto standard platform for running containerized services and applications in distributed environments. While a wide variety of distributions and installers exist to deploy Kubernetes in the cloud environments (public, private or hybrid), or within the bare metal environments, there is still a need to deploy and run Kubernetes locally, for example, on the developer's workstation.
Kubernetes has been originally designed to be deployed and used in the Linux environments. However, a good number of users (and not only application developers) use Windows OS as their daily driver. When Microsoft revealed WSL - the Windows Subsystem for Linux, the line between Windows and Linux environments became even less visible.
Also, WSL brought an ability to run Kubernetes on Windows almost seamlessly!
Below, we will cover in brief how to install and use various solutions to run Kubernetes locally.
Prerequisites
Since we will explain how to install KinD, we won't go into too much detail around the installation of KinD's dependencies.
However, here is the list of the prerequisites needed and their version/lane:
- OS: Windows 10 version 2004, Build 19041
- WSL2 enabled
- In order to install the distros as WSL2 by default, once WSL2 installed, run the command
wsl.exe --set-default-version 2in Powershell
- In order to install the distros as WSL2 by default, once WSL2 installed, run the command
- WSL2 distro installed from the Windows Store - the distro used is Ubuntu-18.04
- Docker Desktop for Windows, stable channel - the version used is 2.2.0.4
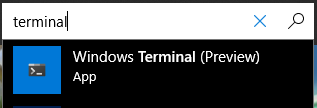
- [Optional] Microsoft Terminal installed from the Windows Store
- Open the Windows store and type "Terminal" in the search, it will be (normally) the first option
And that's actually it. For Docker Desktop for Windows, no need to configure anything yet as we will explain it in the next section.
WSL2: First contact
Once everything is installed, we can launch the WSL2 terminal from the Start menu, and type "Ubuntu" for searching the applications and documents:
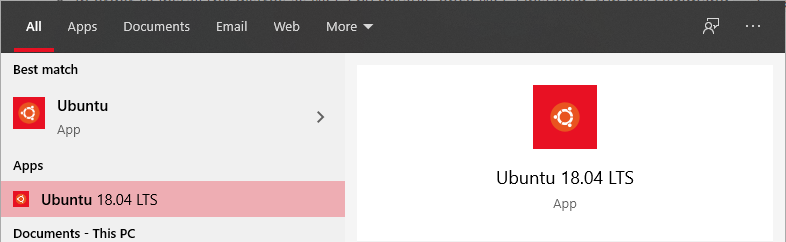
Once found, click on the name and it will launch the default Windows console with the Ubuntu bash shell running.
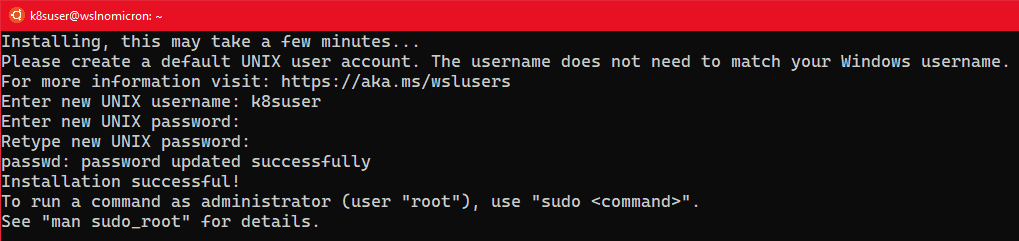
Like for any normal Linux distro, you need to create a user and set a password:
[Optional] Update the sudoers
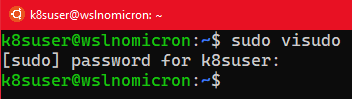
As we are working, normally, on our local computer, it might be nice to update the sudoers and set the group %sudo to be password-less:
# Edit the sudoers with the visudo command
sudo visudo

# Change the %sudo group to be password-less
%sudo   ALL=(ALL:ALL) NOPASSWD: ALL

# Press CTRL+X to exit
# Press Y to save
# Press Enter to confirm
Update Ubuntu
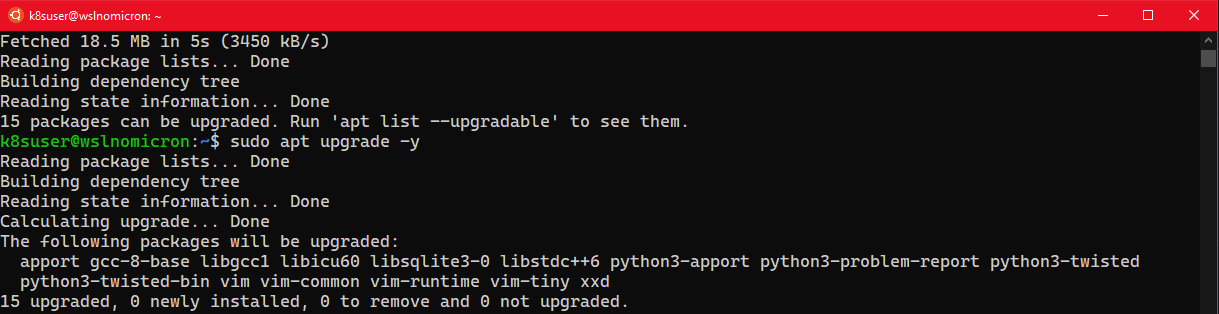
Before we move to the Docker Desktop settings, let's update our system and ensure we start in the best conditions:
# Update the repositories and list of the packages available
sudo apt update
# Update the system based on the packages installed > the "-y" will approve the change automatically
sudo apt upgrade -y
Docker Desktop: faster with WSL2
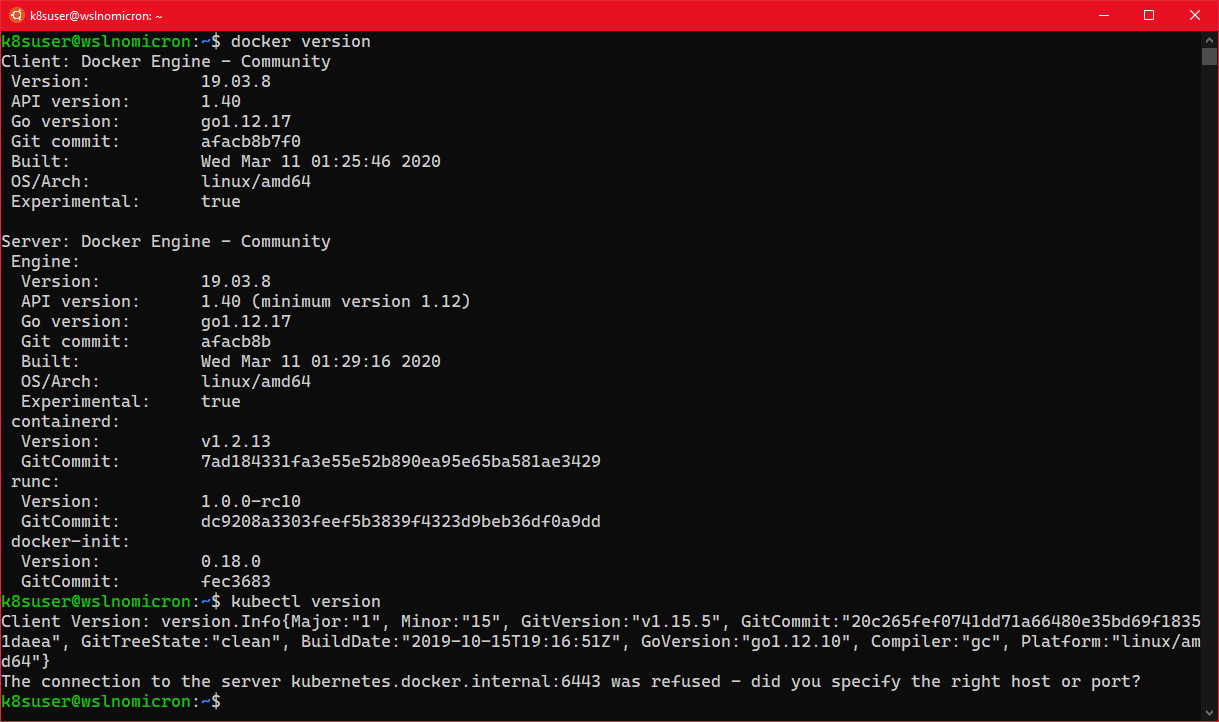
Before we move into the settings, let's do a small test, it will display really how cool the new integration with Docker Desktop is:
# Try to see if the docker cli and daemon are installed
docker version
# Same for kubectl
kubectl version
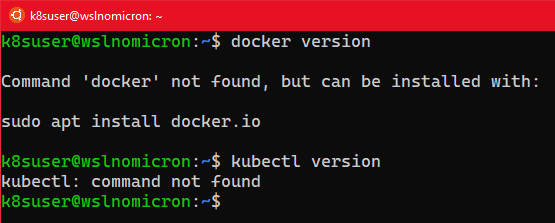
You got an error? Perfect! It's actually good news, so let's now move on to the settings.
Docker Desktop settings: enable WSL2 integration
First let's start Docker Desktop for Windows if it's not still the case. Open the Windows start menu and type "docker", click on the name to start the application:

You should now see the Docker icon with the other taskbar icons near the clock:

Now click on the Docker icon and choose settings. A new window will appear:
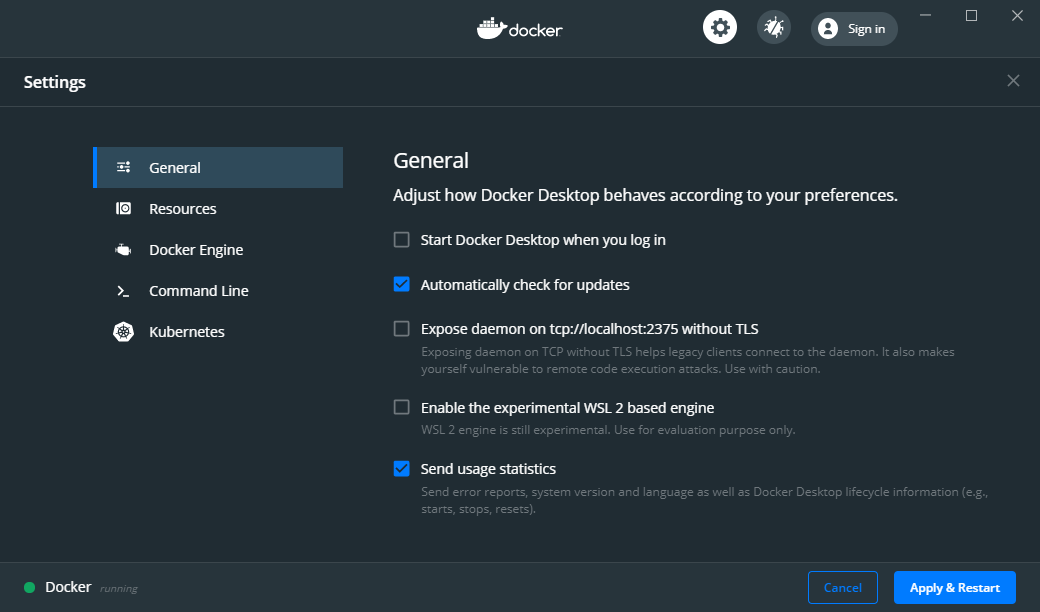
By default, the WSL2 integration is not active, so click the "Enable the experimental WSL 2 based engine" and click "Apply & Restart":
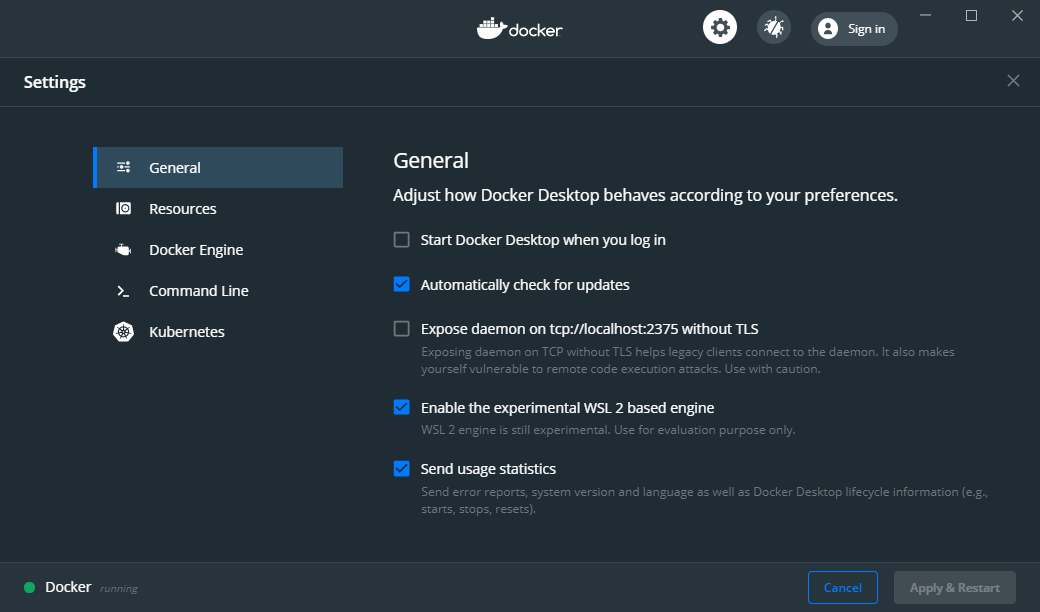
What this feature did behind the scenes was to create two new distros in WSL2, containing and running all the needed backend sockets, daemons and also the CLI tools (read: docker and kubectl command).
Still, this first setting is still not enough to run the commands inside our distro. If we try, we will have the same error as before.
In order to fix it, and finally be able to use the commands, we need to tell the Docker Desktop to "attach" itself to our distro also:
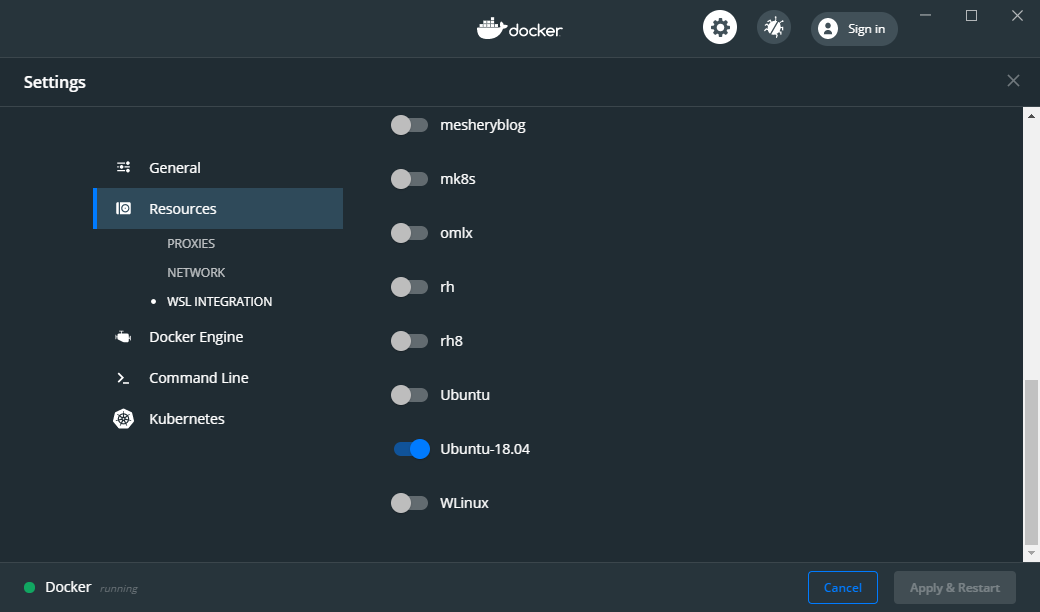
Let's now switch back to our WSL2 terminal and see if we can (finally) launch the commands:
# Try to see if the docker cli and daemon are installed
docker version
# Same for kubectl
kubectl version
Tip: if nothing happens, restart Docker Desktop and restart the WSL process in Powershell:
Restart-Service LxssManagerand launch a new Ubuntu session
And success! The basic settings are now done and we move to the installation of KinD.
KinD: Kubernetes made easy in a container
Right now, we have Docker that is installed, configured and the last test worked fine.
However, if we look carefully at the kubectl command, it found the "Client Version" (1.15.5), but it didn't find any server.
This is normal as we didn't enable the Docker Kubernetes cluster. So let's install KinD and create our first cluster.
And as sources are always important to mention, we will follow (partially) the how-to on the official KinD website:
# Download the latest version of KinD
curl -Lo ./kind https://github.com/kubernetes-sigs/kind/releases/download/v0.7.0/kind-linux-amd64
# Make the binary executable
chmod +x ./kind
# Move the binary to your executable path
sudo mv ./kind /usr/local/bin/

KinD: the first cluster
We are ready to create our first cluster:
# Check if the KUBECONFIG is not set
echo $KUBECONFIG
# Check if the .kube directory is created > if not, no need to create it
ls $HOME/.kube
# Create the cluster and give it a name (optional)
kind create cluster --name wslkind
# Check if the .kube has been created and populated with files
ls $HOME/.kube
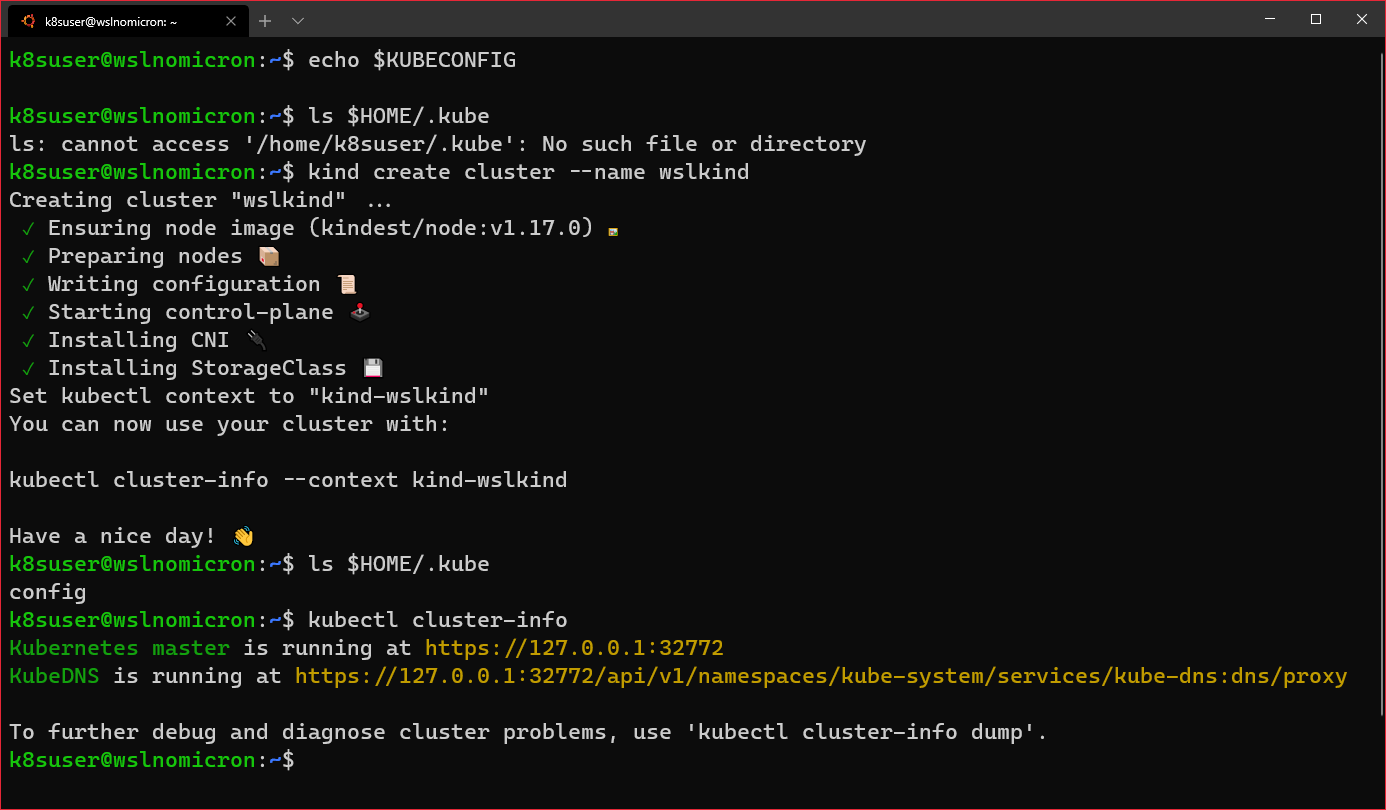
Tip: as you can see, the Terminal was changed so the nice icons are all displayed
The cluster has been successfully created, and because we are using Docker Desktop, the network is all set for us to use "as is".
So we can open the Kubernetes master URL in our Windows browser:
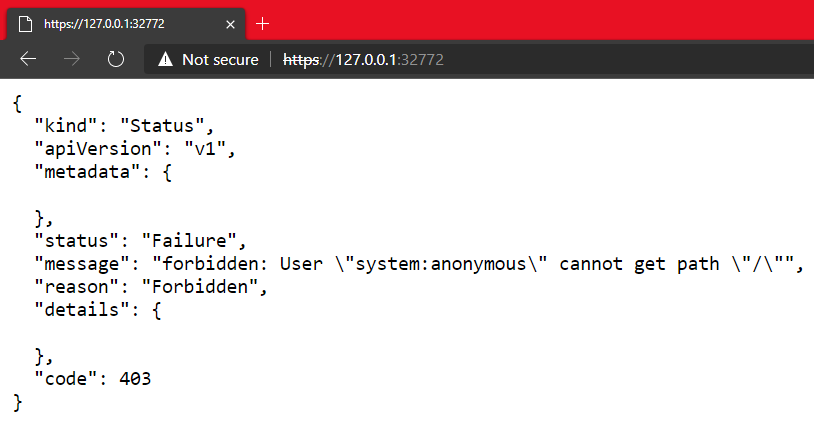
And this is the real strength from Docker Desktop for Windows with the WSL2 backend. Docker really did an amazing integration.
KinD: counting 1 - 2 - 3
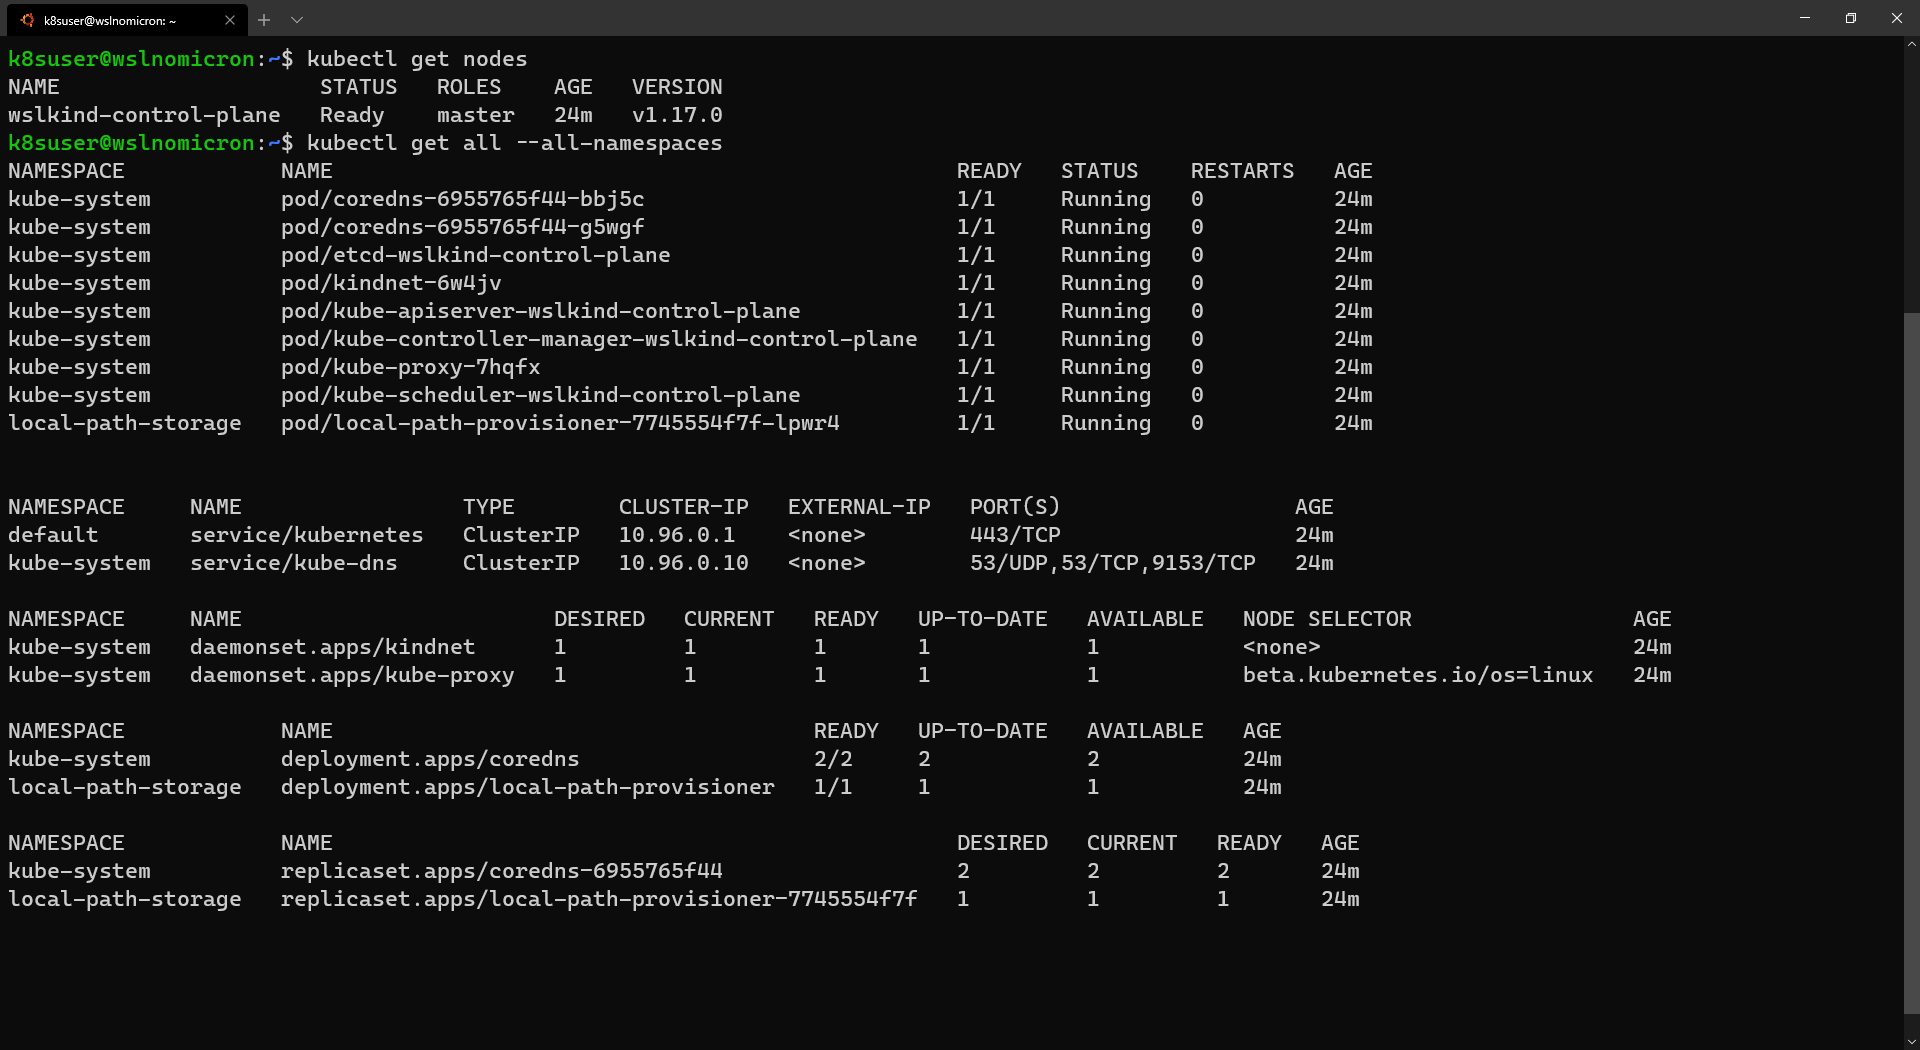
Our first cluster was created and it's the "normal" one node cluster:
# Check how many nodes it created
kubectl get nodes
# Check the services for the whole cluster
kubectl get all --all-namespaces
While this will be enough for most people, let's leverage one of the coolest feature, multi-node clustering:
# Delete the existing cluster
kind delete cluster --name wslkind
# Create a config file for a 3 nodes cluster
cat << EOF > kind-3nodes.yaml
kind: Cluster
apiVersion: kind.x-k8s.io/v1alpha4
nodes:
  - role: control-plane
  - role: worker
  - role: worker
EOF
# Create a new cluster with the config file
kind create cluster --name wslkindmultinodes --config ./kind-3nodes.yaml
# Check how many nodes it created
kubectl get nodes
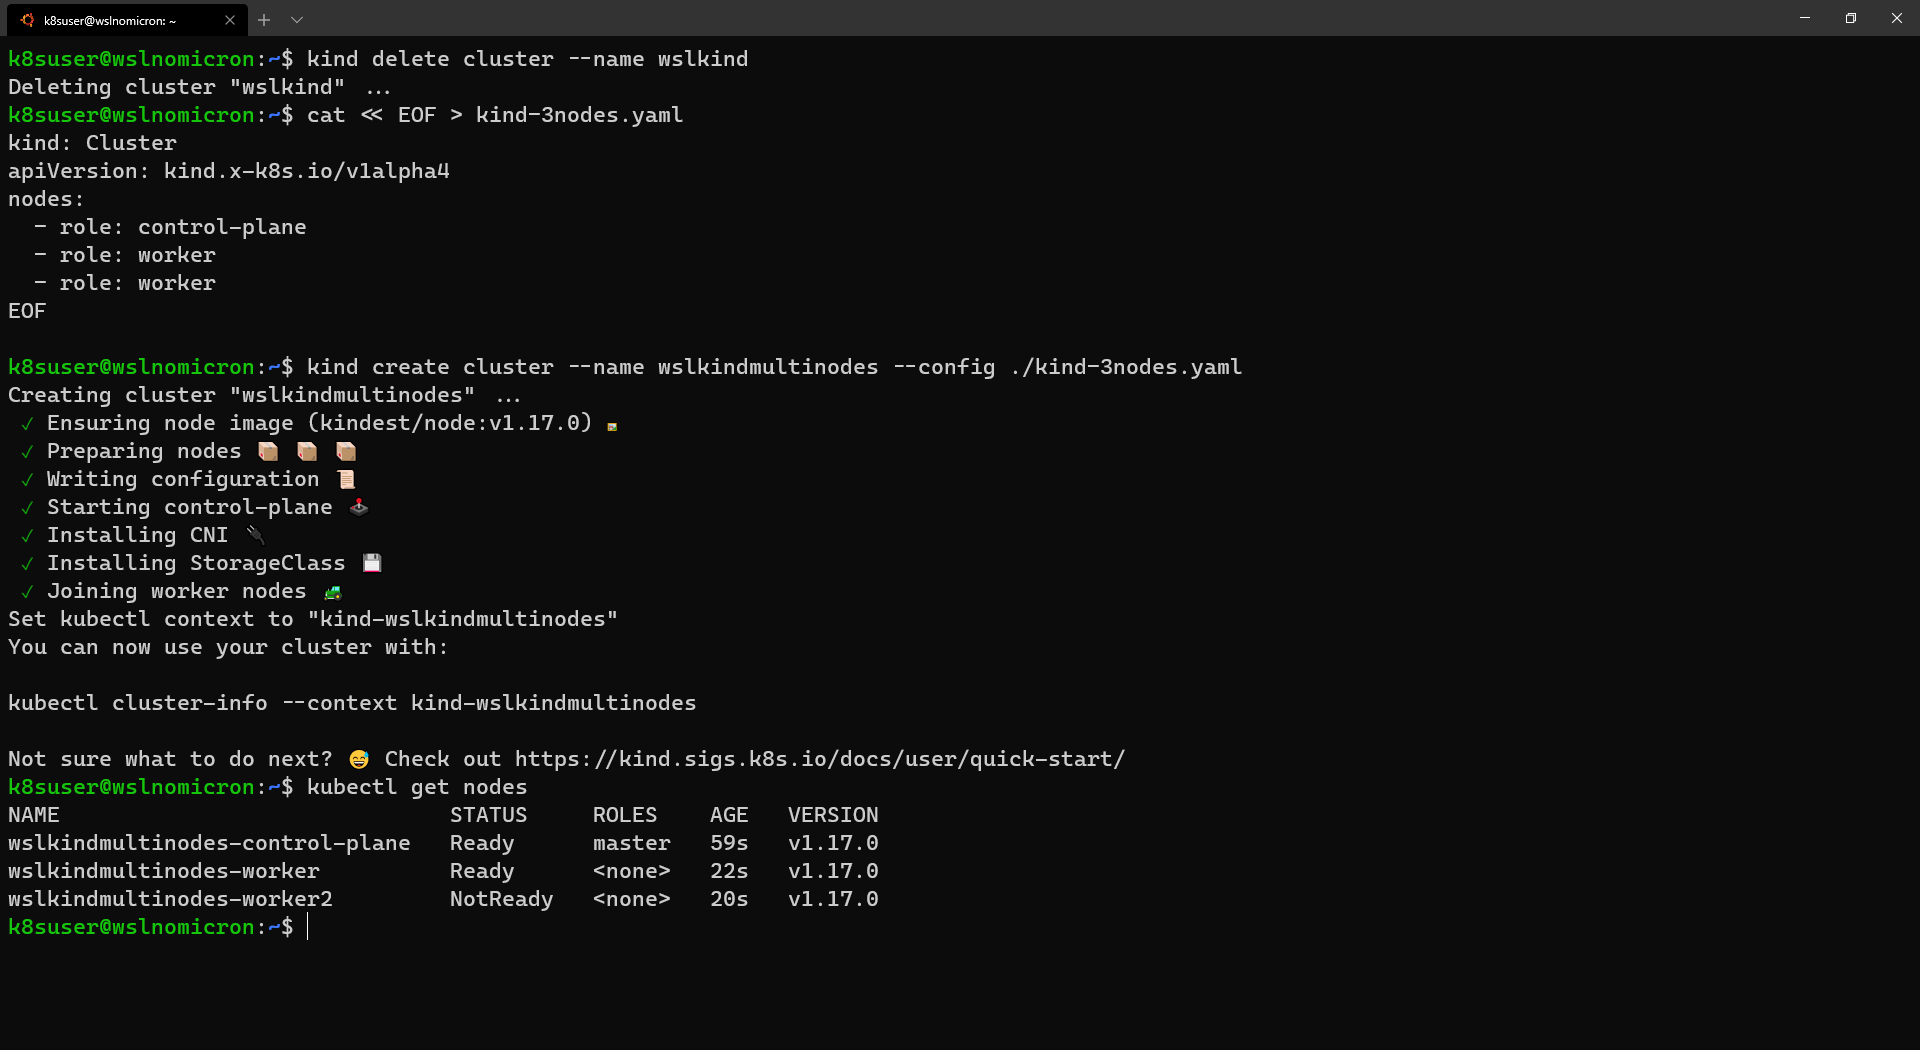
Tip: depending on how fast we run the "get nodes" command, it can be that not all the nodes are ready, wait few seconds and run it again, everything should be ready
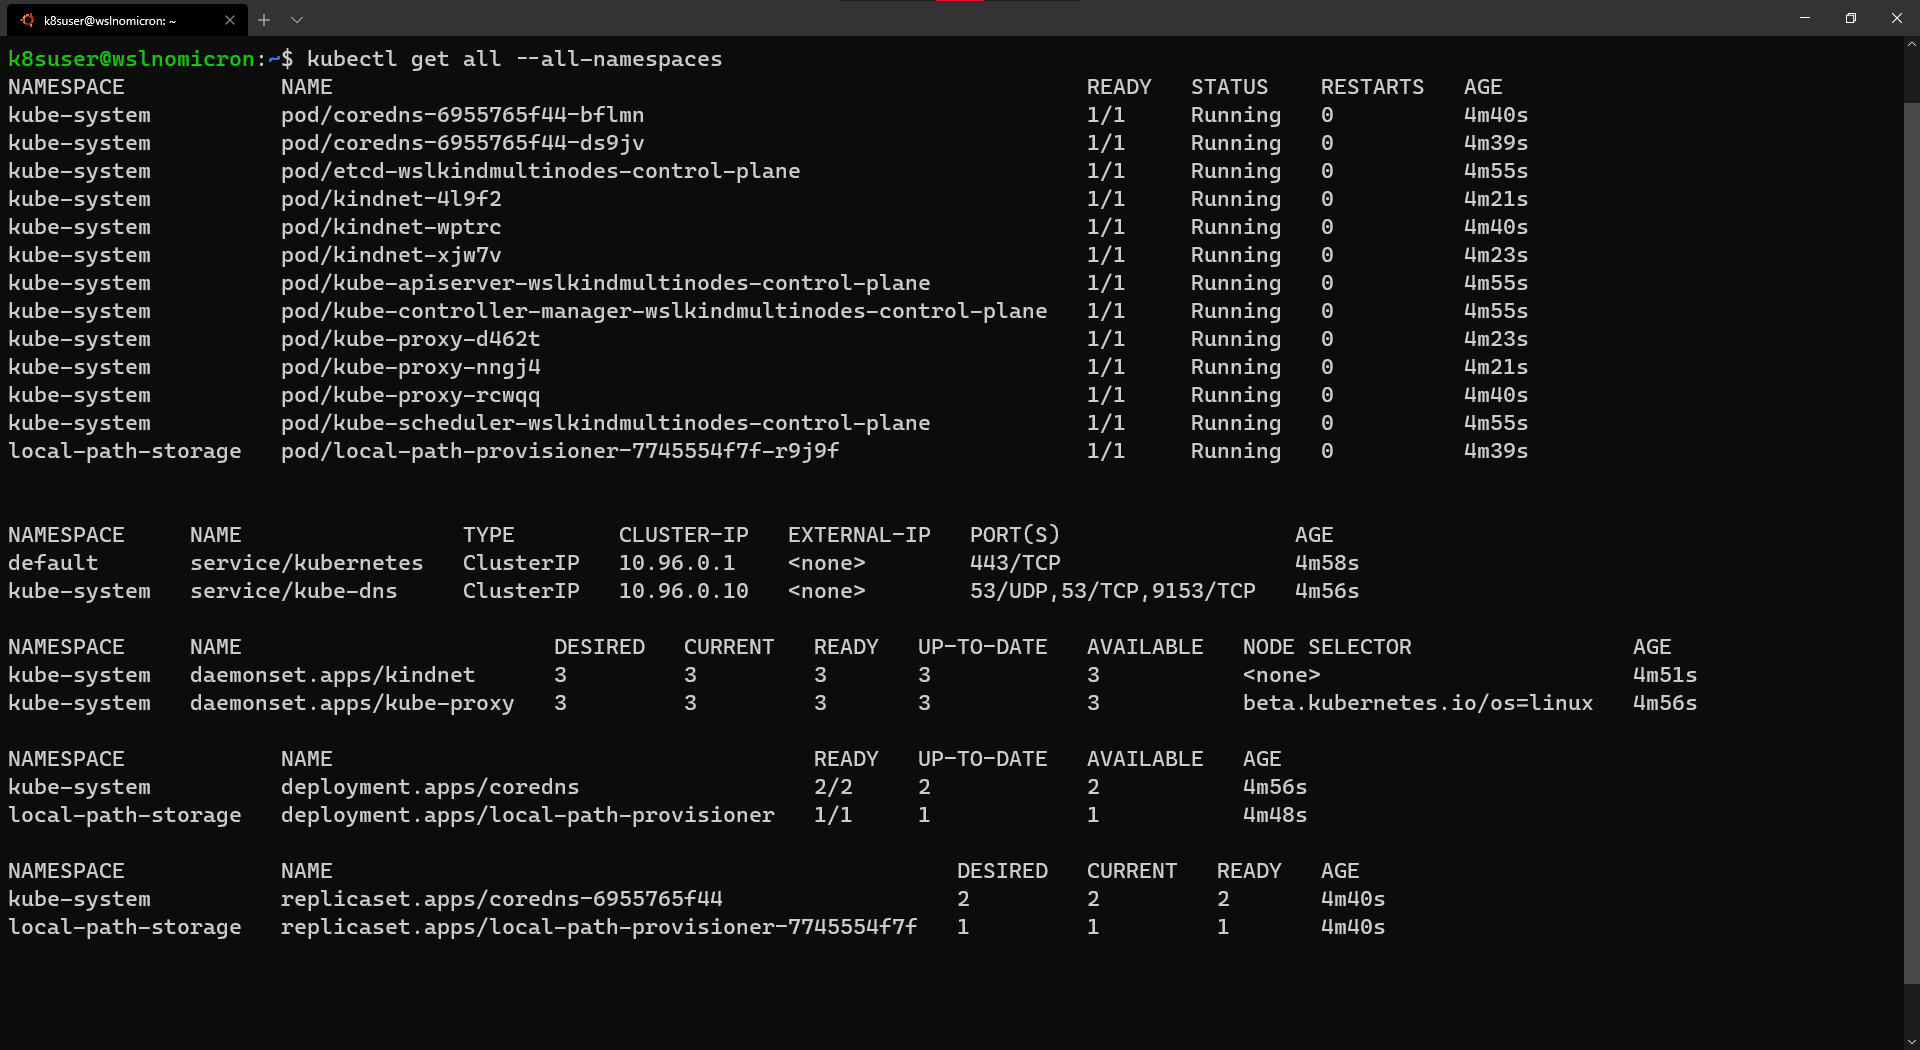
And that's it, we have created a three-node cluster, and if we look at the services one more time, we will see several that have now three replicas:
# Check the services for the whole cluster
kubectl get all --all-namespaces
KinD: can I see a nice dashboard?
Working on the command line is always good and very insightful. However, when dealing with Kubernetes we might want, at some point, to have a visual overview.
For that, the Kubernetes Dashboard project has been created. The installation and first connection test is quite fast, so let's do it:
# Install the Dashboard application into our cluster
kubectl apply -f https://raw.githubusercontent.com/kubernetes/dashboard/v2.0.0-rc6/aio/deploy/recommended.yaml
# Check the resources it created based on the new namespace created
kubectl get all -n kubernetes-dashboard

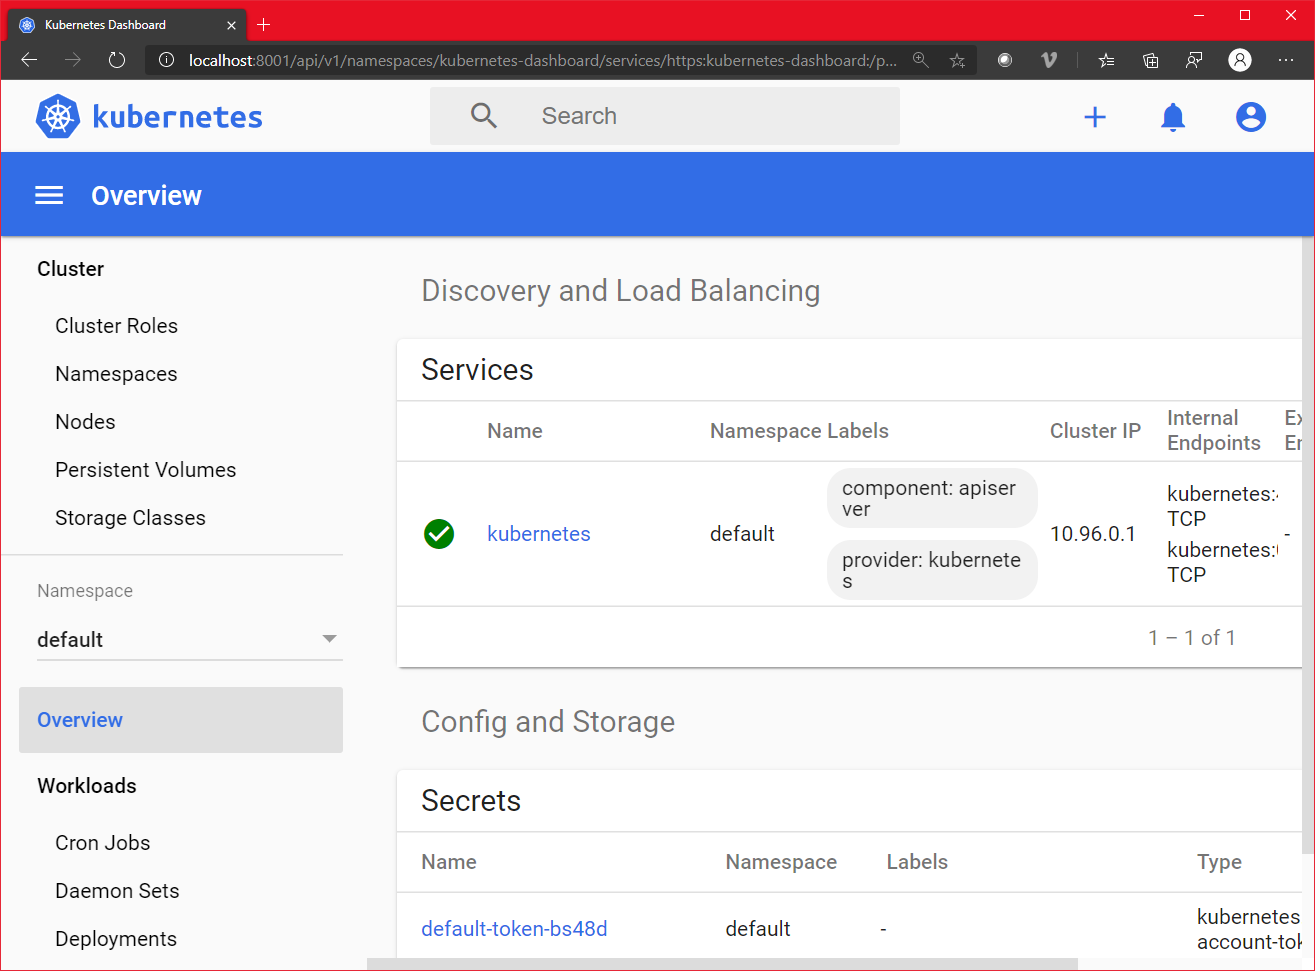
As it created a service with a ClusterIP (read: internal network address), we cannot reach it if we type the URL in our Windows browser:
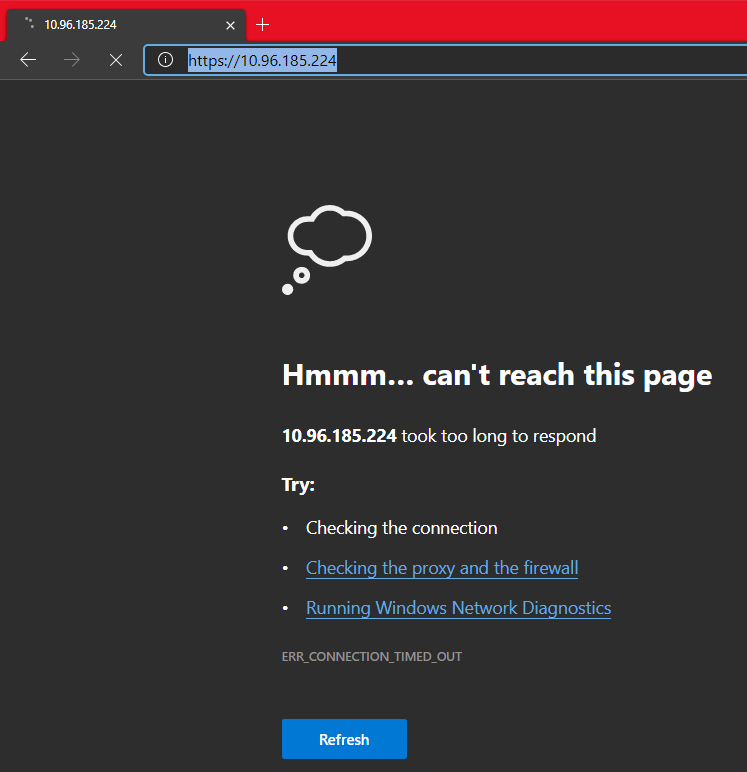
That's because we need to create a temporary proxy:
# Start a kubectl proxy
kubectl proxy
# Enter the URL on your browser: http://localhost:8001/api/v1/namespaces/kubernetes-dashboard/services/https:kubernetes-dashboard:/proxy/

Finally to login, we can either enter a Token, which we didn't create, or enter the kubeconfig file from our Cluster.
If we try to login with the kubeconfig, we will get the error "Internal error (500): Not enough data to create auth info structure". This is due to the lack of credentials in the kubeconfig file.
So to avoid you ending with the same error, let's follow the recommended RBAC approach.
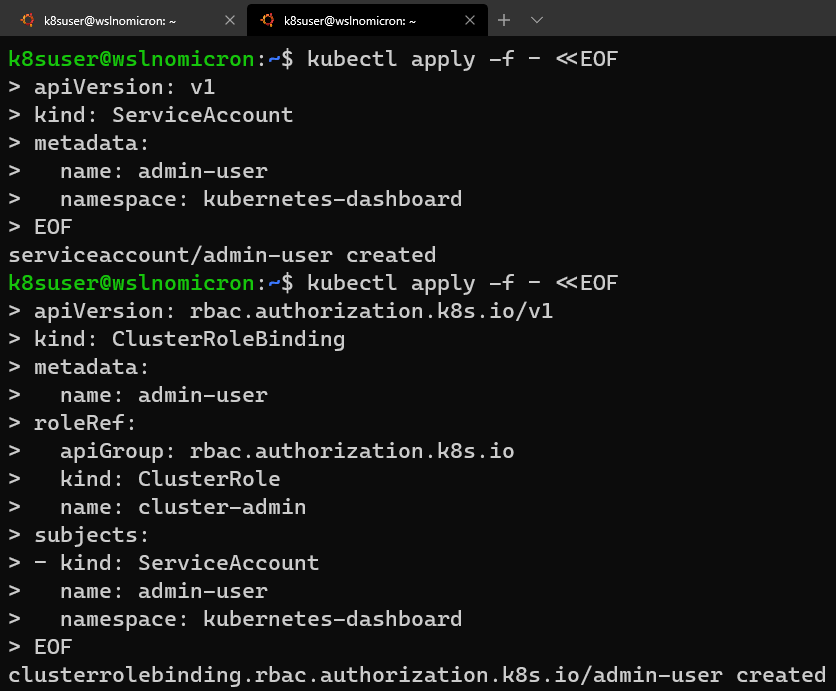
Let's open a new WSL2 session:
# Create a new ServiceAccount
kubectl apply -f - <<EOF
apiVersion: v1
kind: ServiceAccount
metadata:
  name: admin-user
  namespace: kubernetes-dashboard
EOF
# Create a ClusterRoleBinding for the ServiceAccount
kubectl apply -f - <<EOF
apiVersion: rbac.authorization.k8s.io/v1
kind: ClusterRoleBinding
metadata:
  name: admin-user
roleRef:
  apiGroup: rbac.authorization.k8s.io
  kind: ClusterRole
  name: cluster-admin
subjects:
- kind: ServiceAccount
  name: admin-user
  namespace: kubernetes-dashboard
EOF
# Get the Token for the ServiceAccount
kubectl -n kubernetes-dashboard describe secret $(kubectl -n kubernetes-dashboard get secret | grep admin-user | awk '{print $1}')
# Copy the token and copy it into the Dashboard login and press "Sign in"
Success! And let's see our nodes listed also:
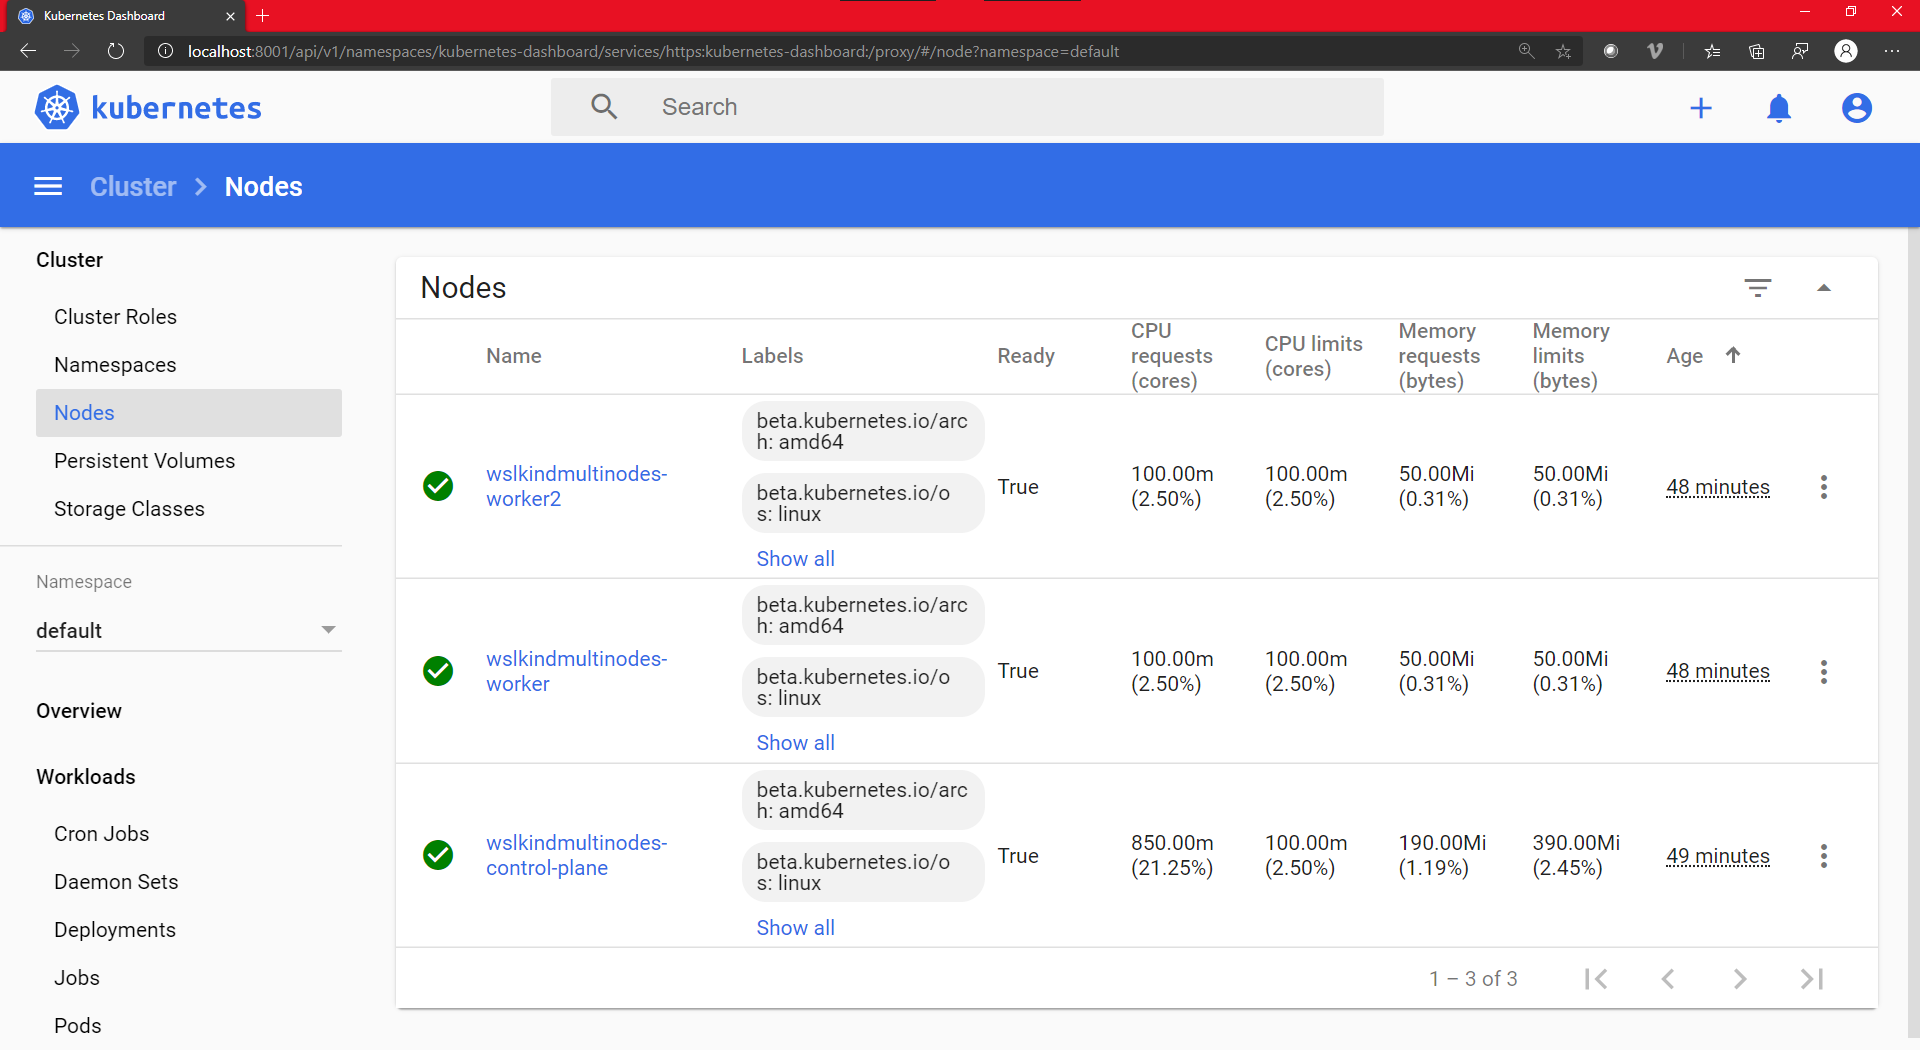
A nice and shiny three nodes appear.
Minikube: Kubernetes from everywhere
Right now, we have Docker that is installed, configured and the last test worked fine.
However, if we look carefully at the kubectl command, it found the "Client Version" (1.15.5), but it didn't find any server.
This is normal as we didn't enable the Docker Kubernetes cluster. So let's install Minikube and create our first cluster.
And as sources are always important to mention, we will follow (partially) the how-to from the Kubernetes.io website:
# Download the latest version of Minikube
curl -Lo minikube https://storage.googleapis.com/minikube/releases/latest/minikube-linux-amd64
# Make the binary executable
chmod +x ./minikube
# Move the binary to your executable path
sudo mv ./minikube /usr/local/bin/

Minikube: updating the host
If we follow the how-to, it states that we should use the --driver=none flag in order to run Minikube directly on the host and Docker.
Unfortunately, we will get an error about "conntrack" being required to run Kubernetes v 1.18:
# Create a minikube one node cluster
minikube start --driver=none

Tip: as you can see, the Terminal was changed so the nice icons are all displayed
So let's fix the issue by installing the missing package:
# Install the conntrack package
sudo apt install -y conntrack
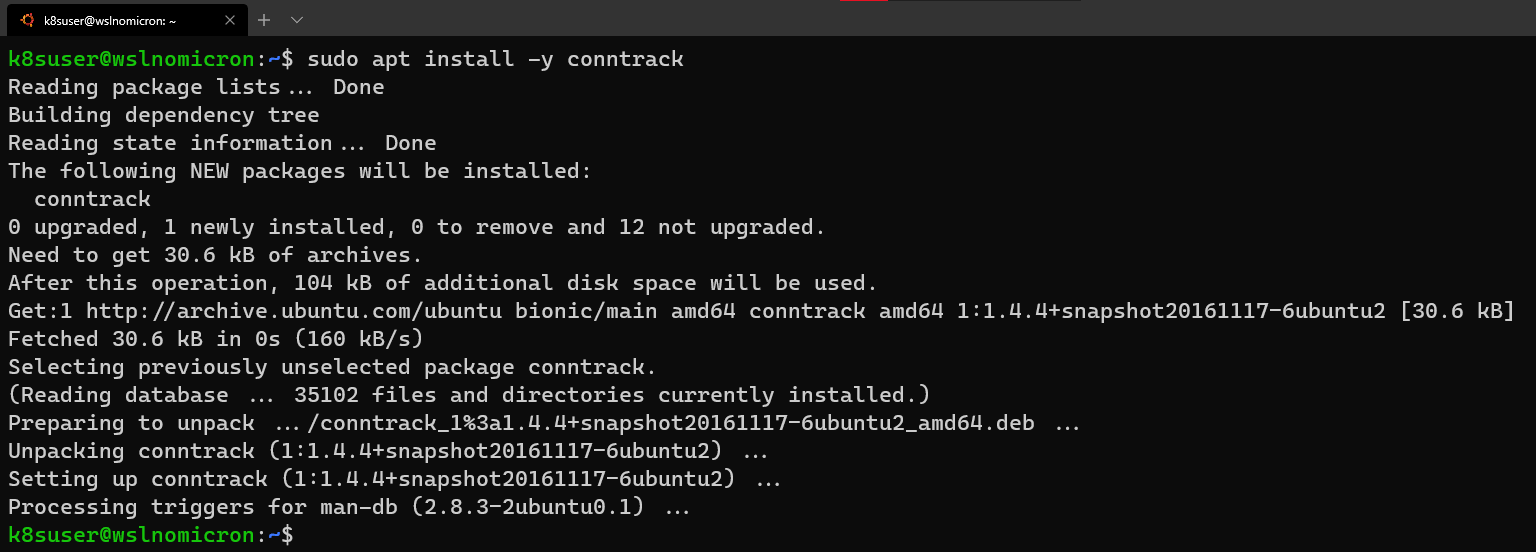
Let's try to launch it again:
# Create a minikube one node cluster
minikube start --driver=none
# We got a permissions error > try again with sudo
sudo minikube start --driver=none
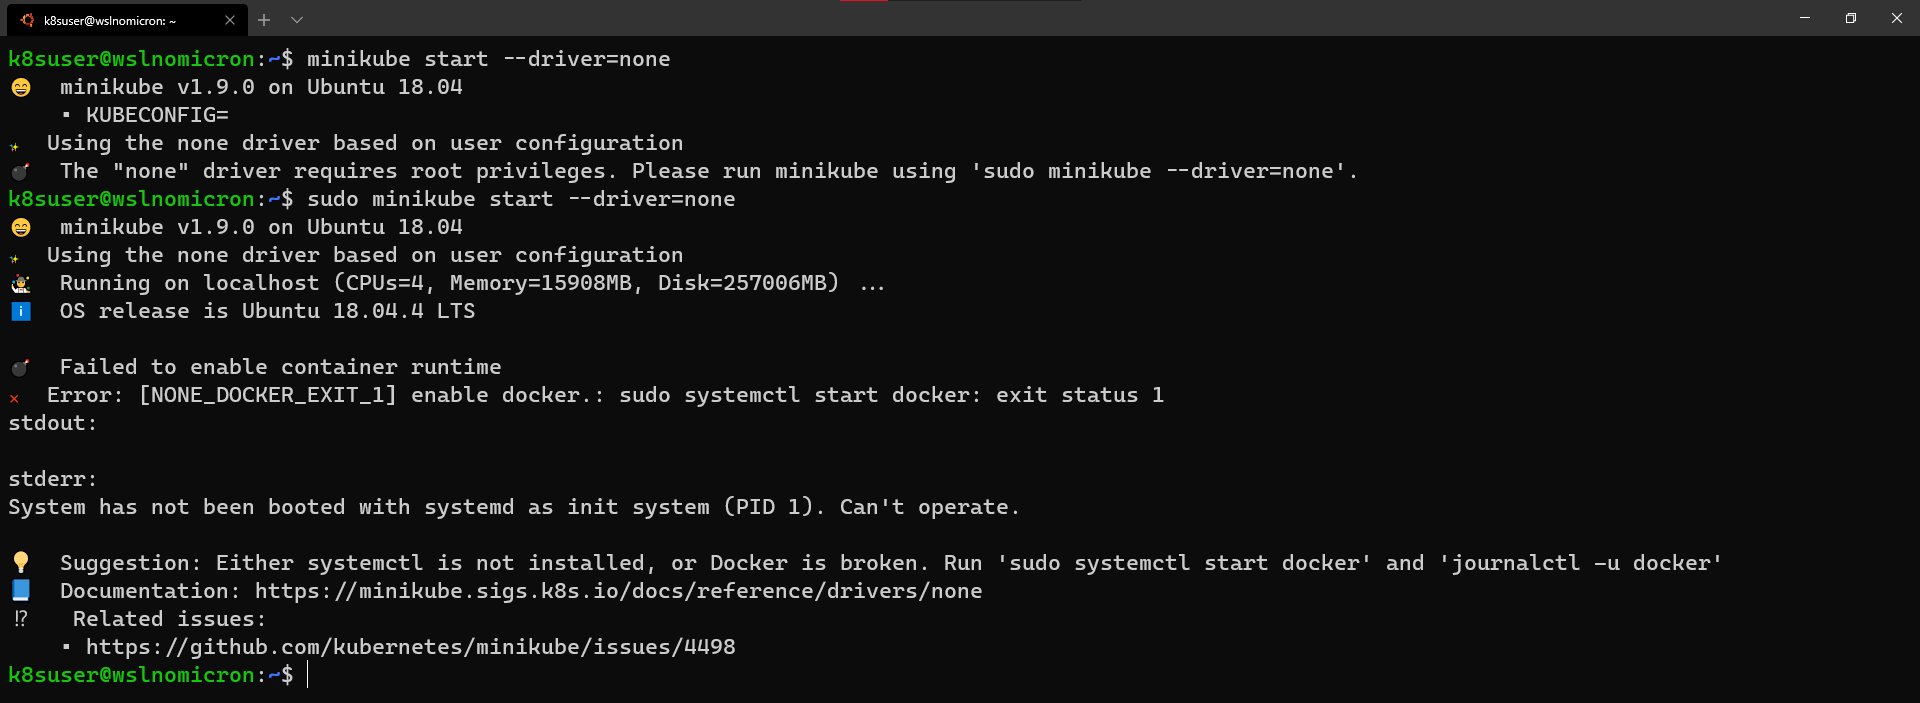
Ok, this error cloud be problematic ... in the past. Luckily for us, there's a solution
Minikube: enabling SystemD
In order to enable SystemD on WSL2, we will apply the scripts from Daniel Llewellyn.
I invite you to read the full blog post and how he came to the solution, and the various iterations he did to fix several issues.
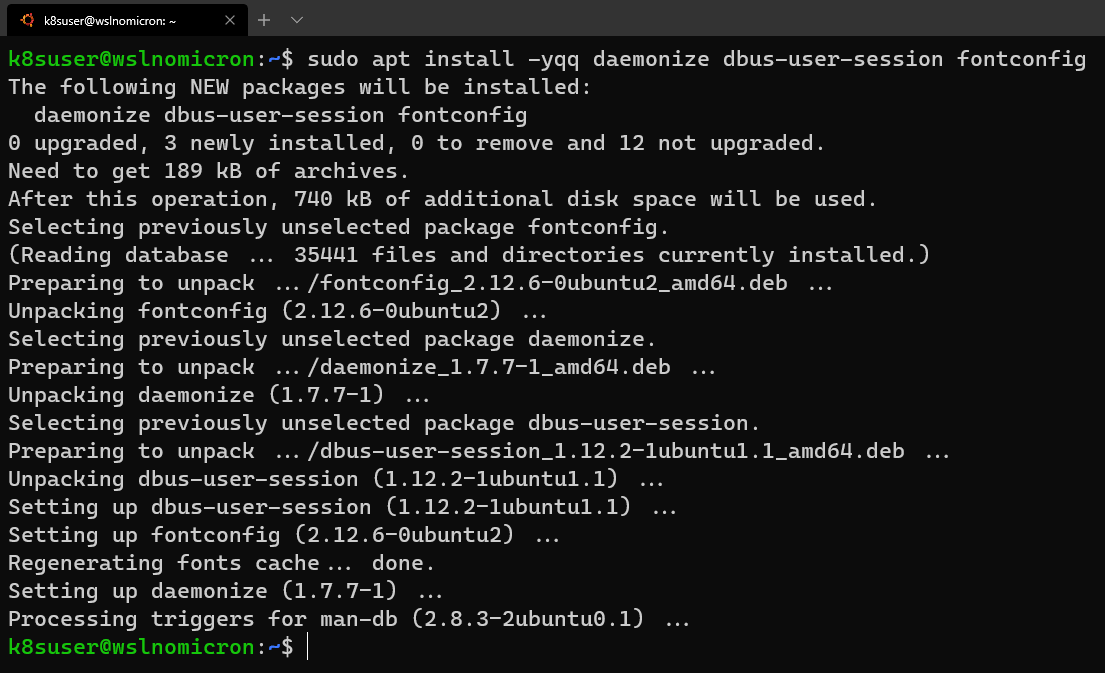
So in a nutshell, here are the commands:
# Install the needed packages
sudo apt install -yqq daemonize dbus-user-session fontconfig
# Create the start-systemd-namespace script
sudo vi /usr/sbin/start-systemd-namespace
#!/bin/bash

SYSTEMD_PID=$(ps -ef | grep '/lib/systemd/systemd --system-unit=basic.target$' | grep -v unshare | awk '{print $2}')
if [ -z "$SYSTEMD_PID" ] || [ "$SYSTEMD_PID" != "1" ]; then
    export PRE_NAMESPACE_PATH="$PATH"
    (set -o posix; set) | \
        grep -v "^BASH" | \
        grep -v "^DIRSTACK=" | \
        grep -v "^EUID=" | \
        grep -v "^GROUPS=" | \
        grep -v "^HOME=" | \
        grep -v "^HOSTNAME=" | \
        grep -v "^HOSTTYPE=" | \
        grep -v "^IFS='.*"$'\n'"'" | \
        grep -v "^LANG=" | \
        grep -v "^LOGNAME=" | \
        grep -v "^MACHTYPE=" | \
        grep -v "^NAME=" | \
        grep -v "^OPTERR=" | \
        grep -v "^OPTIND=" | \
        grep -v "^OSTYPE=" | \
        grep -v "^PIPESTATUS=" | \
        grep -v "^POSIXLY_CORRECT=" | \
        grep -v "^PPID=" | \
        grep -v "^PS1=" | \
        grep -v "^PS4=" | \
        grep -v "^SHELL=" | \
        grep -v "^SHELLOPTS=" | \
        grep -v "^SHLVL=" | \
        grep -v "^SYSTEMD_PID=" | \
        grep -v "^UID=" | \
        grep -v "^USER=" | \
        grep -v "^_=" | \
        cat - > "$HOME/.systemd-env"
    echo "PATH='$PATH'" >> "$HOME/.systemd-env"
    exec sudo /usr/sbin/enter-systemd-namespace "$BASH_EXECUTION_STRING"
fi
if [ -n "$PRE_NAMESPACE_PATH" ]; then
    export PATH="$PRE_NAMESPACE_PATH"
fi
# Create the enter-systemd-namespace
sudo vi /usr/sbin/enter-systemd-namespace
#!/bin/bash

if [ "$UID" != 0 ]; then
    echo "You need to run $0 through sudo"
    exit 1
fi

SYSTEMD_PID="$(ps -ef | grep '/lib/systemd/systemd --system-unit=basic.target$' | grep -v unshare | awk '{print $2}')"
if [ -z "$SYSTEMD_PID" ]; then
    /usr/sbin/daemonize /usr/bin/unshare --fork --pid --mount-proc /lib/systemd/systemd --system-unit=basic.target
    while [ -z "$SYSTEMD_PID" ]; do
        SYSTEMD_PID="$(ps -ef | grep '/lib/systemd/systemd --system-unit=basic.target$' | grep -v unshare | awk '{print $2}')"
    done
fi

if [ -n "$SYSTEMD_PID" ] && [ "$SYSTEMD_PID" != "1" ]; then
    if [ -n "$1" ] && [ "$1" != "bash --login" ] && [ "$1" != "/bin/bash --login" ]; then
        exec /usr/bin/nsenter -t "$SYSTEMD_PID" -a \
            /usr/bin/sudo -H -u "$SUDO_USER" \
            /bin/bash -c 'set -a; source "$HOME/.systemd-env"; set +a; exec bash -c '"$(printf "%q" "$@")"
    else
        exec /usr/bin/nsenter -t "$SYSTEMD_PID" -a \
            /bin/login -p -f "$SUDO_USER" \
            $(/bin/cat "$HOME/.systemd-env" | grep -v "^PATH=")
    fi
    echo "Existential crisis"
fi
# Edit the permissions of the enter-systemd-namespace script
sudo chmod +x /usr/sbin/enter-systemd-namespace
# Edit the bash.bashrc file
sudo sed -i 2a"# Start or enter a PID namespace in WSL2\nsource /usr/sbin/start-systemd-namespace\n" /etc/bash.bashrc
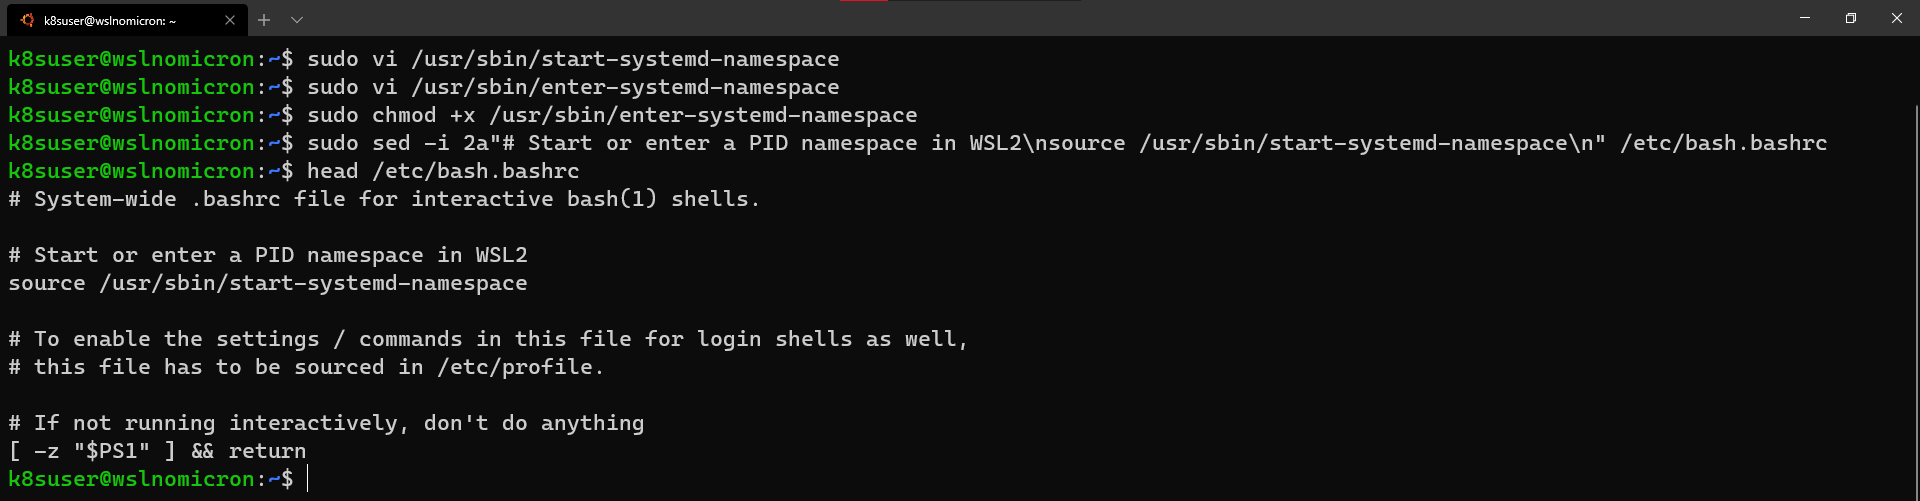
Finally, exit and launch a new session. You do not need to stop WSL2, a new session is enough:
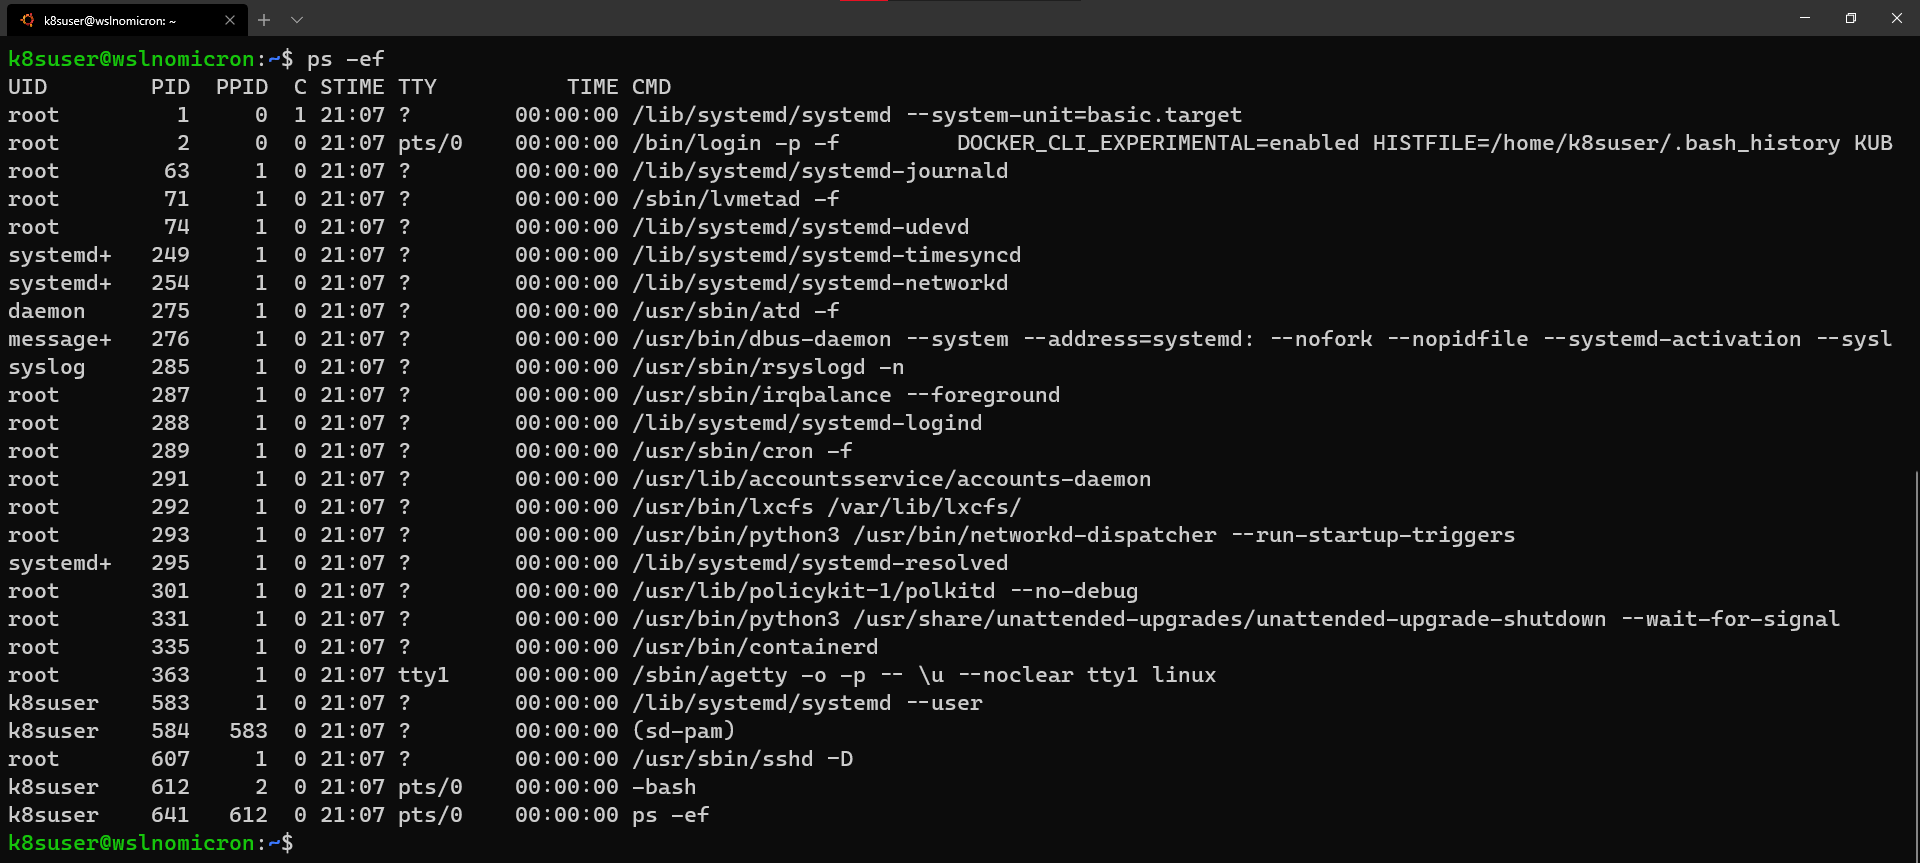
Minikube: the first cluster
We are ready to create our first cluster:
# Check if the KUBECONFIG is not set
echo $KUBECONFIG
# Check if the .kube directory is created > if not, no need to create it
ls $HOME/.kube
# Check if the .minikube directory is created > if yes, delete it
ls $HOME/.minikube
# Create the cluster with sudo
sudo minikube start --driver=none
In order to be able to use kubectl with our user, and not sudo, Minikube recommends running the chown command:
# Change the owner of the .kube and .minikube directories
sudo chown -R $USER $HOME/.kube $HOME/.minikube
# Check the access and if the cluster is running
kubectl cluster-info
# Check the resources created
kubectl get all --all-namespaces
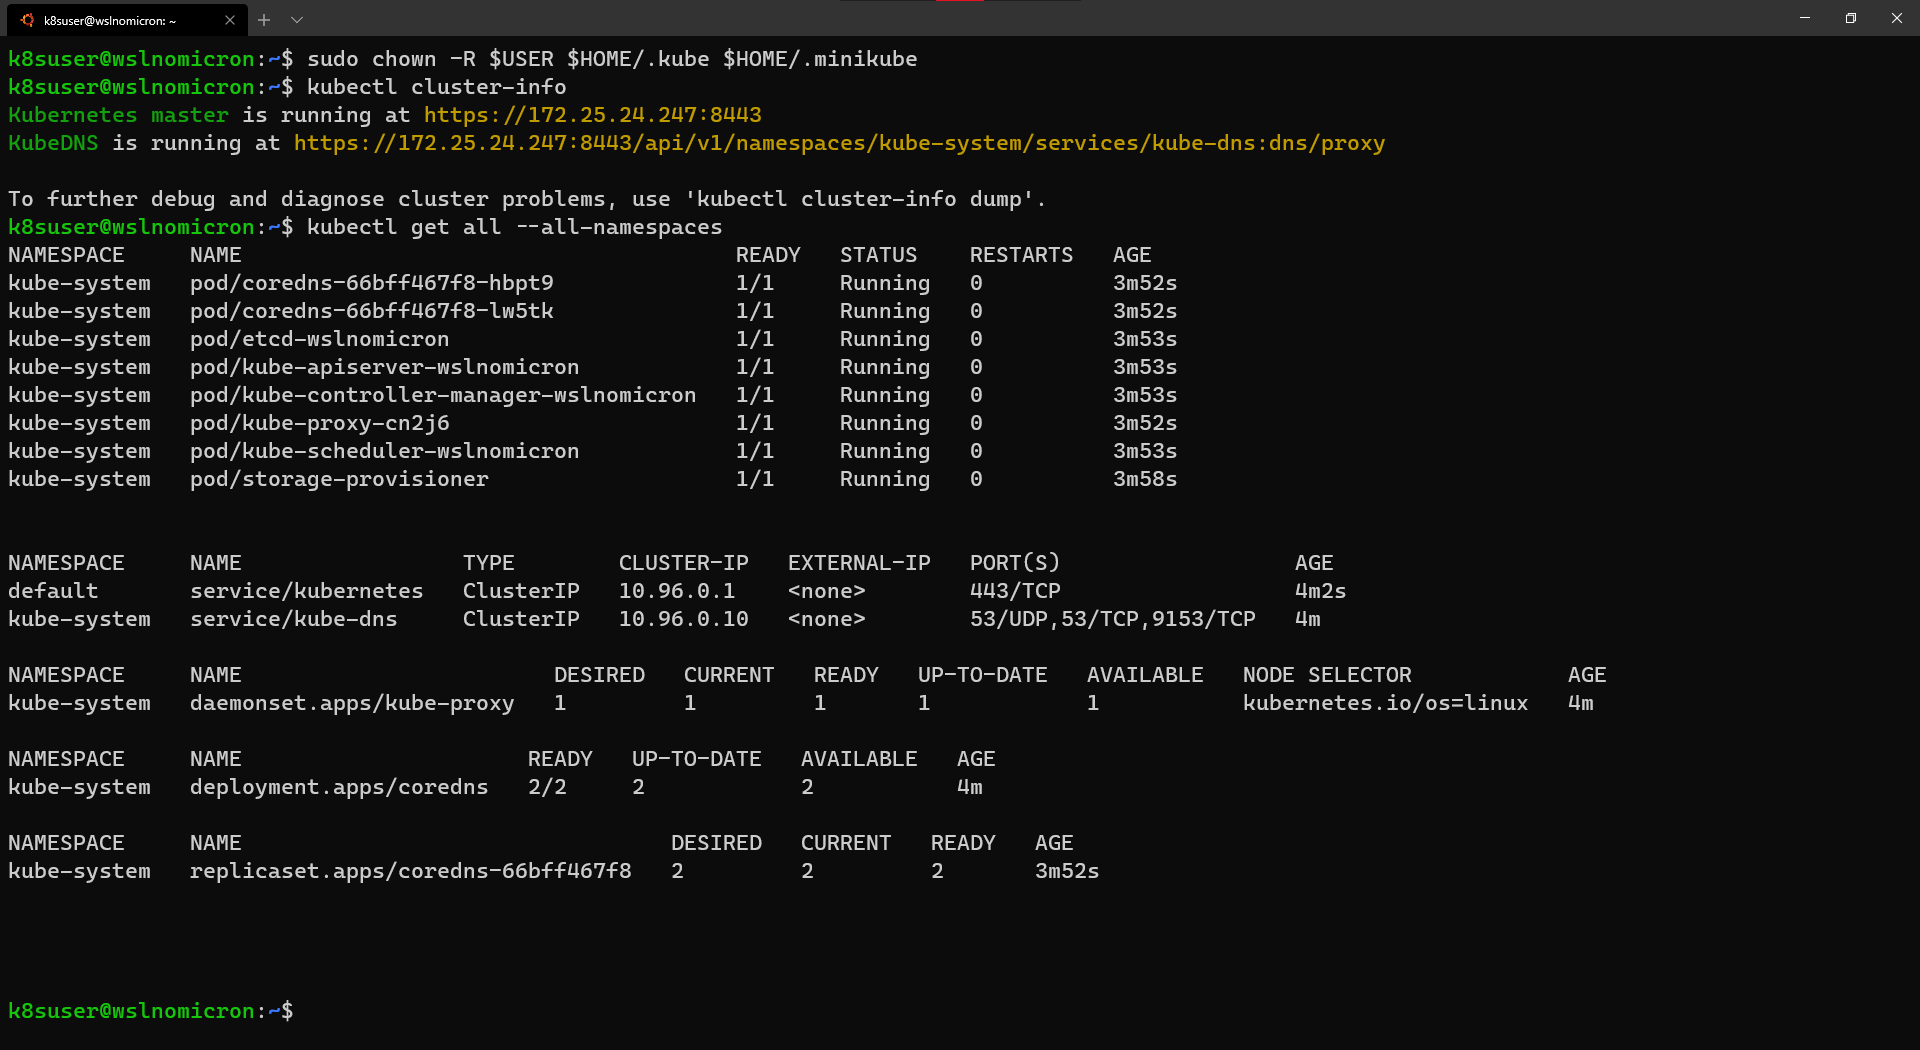
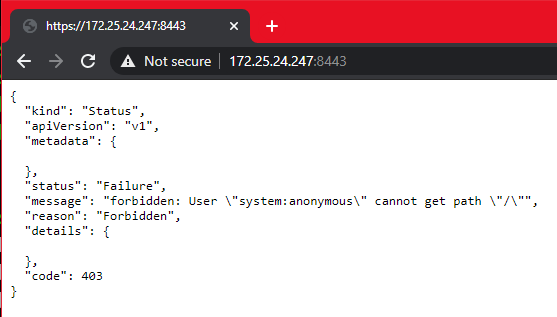
The cluster has been successfully created, and Minikube used the WSL2 IP, which is great for several reasons, and one of them is that we can open the Kubernetes master URL in our Windows browser:
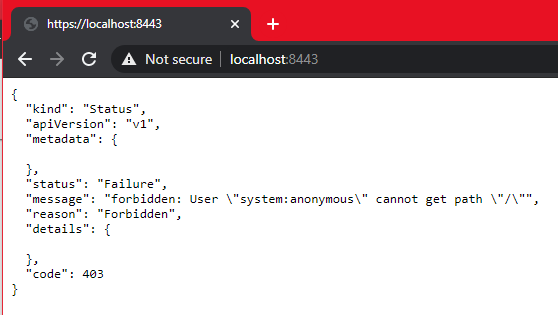
And the real strength of WSL2 integration, the port 8443 once open on WSL2 distro, it actually forwards it to Windows, so instead of the need to remind the IP address, we can also reach the Kubernetes master URL via localhost:
Minikube: can I see a nice dashboard?
Working on the command line is always good and very insightful. However, when dealing with Kubernetes we might want, at some point, to have a visual overview.
For that, Minikube embedded the Kubernetes Dashboard. Thanks to it, running and accessing the Dashboard is very simple:
# Enable the Dashboard service
sudo minikube dashboard
# Access the Dashboard from a browser on Windows side
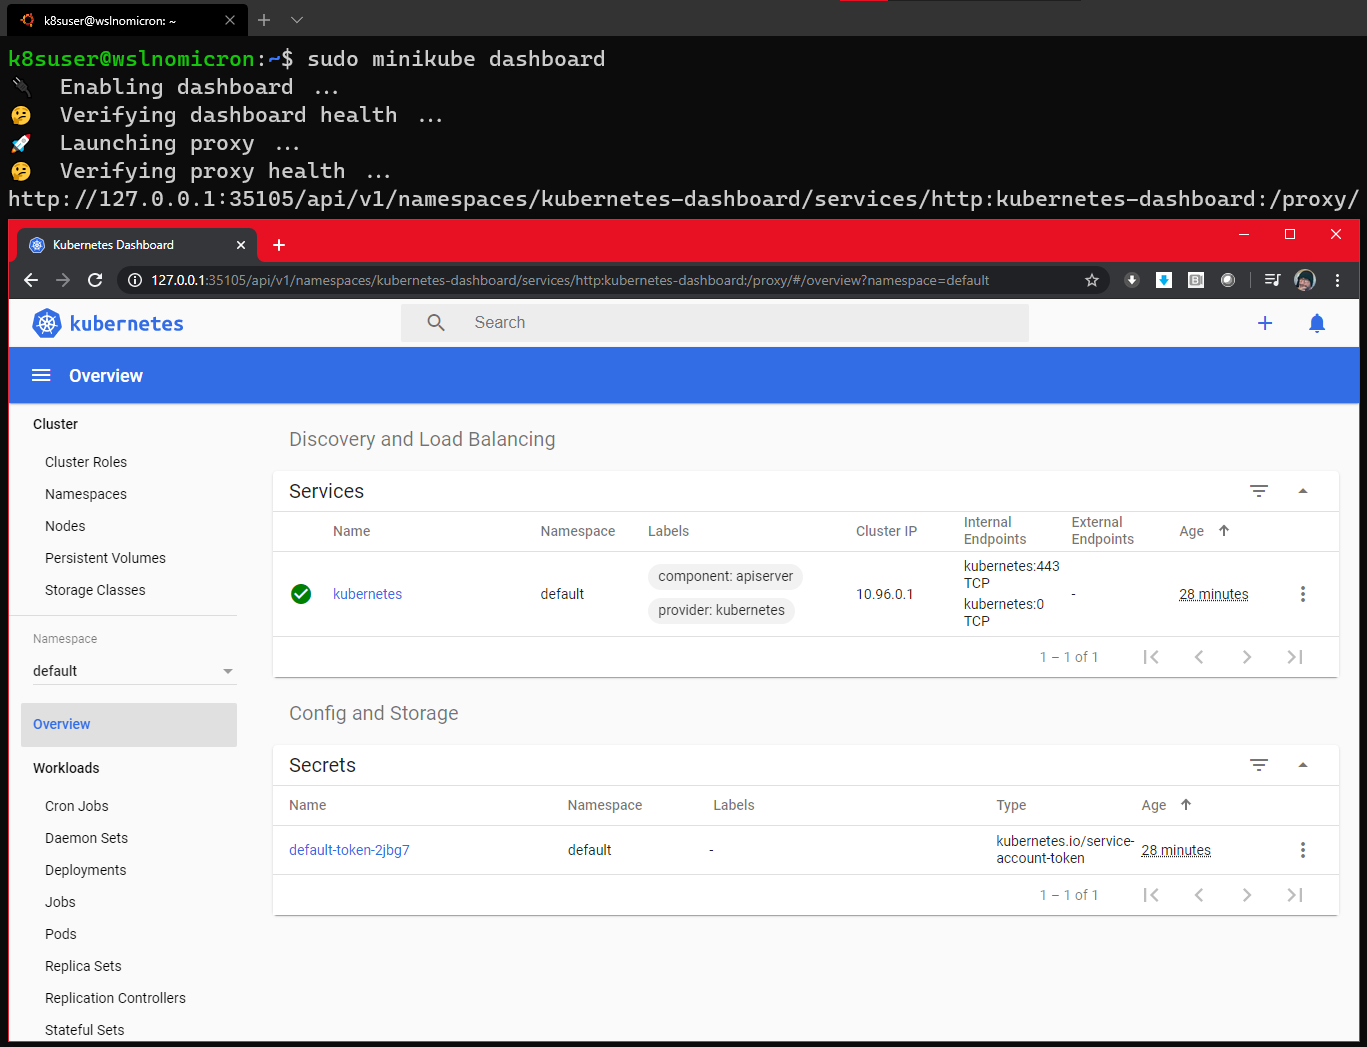
The command creates also a proxy, which means that once we end the command, by pressing CTRL+C, the Dashboard will no more be accessible.
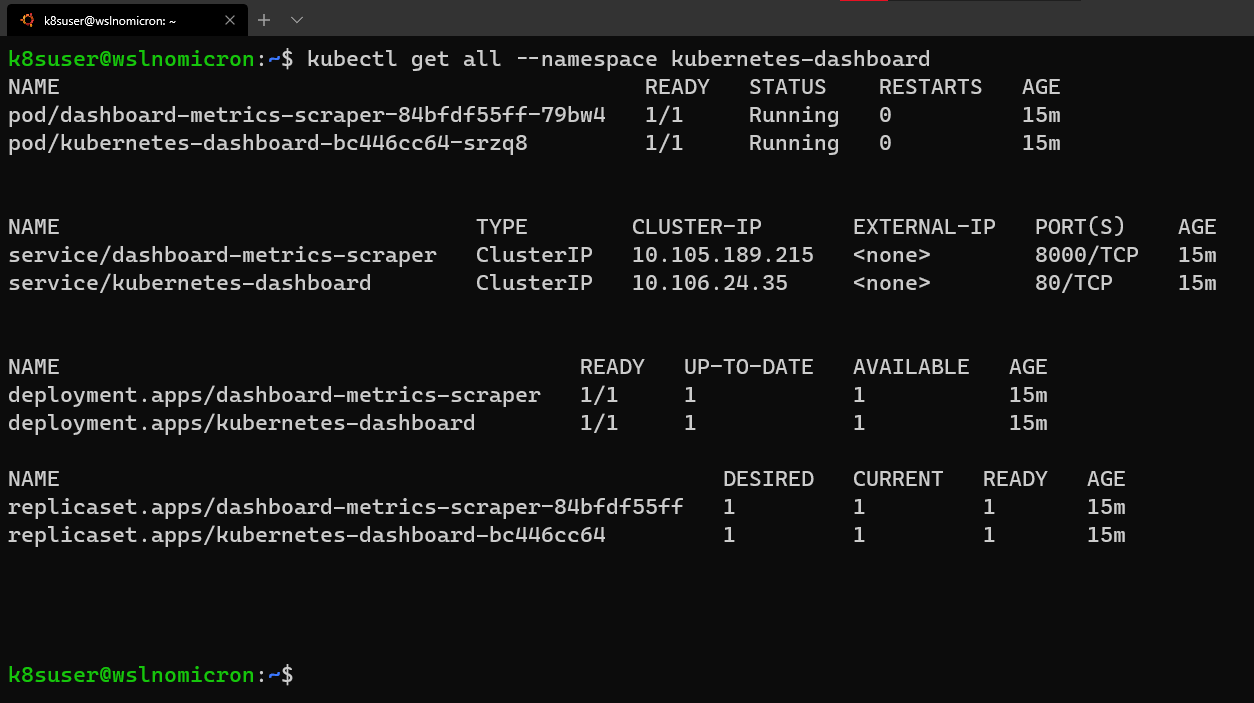
Still, if we look at the namespace kubernetes-dashboard, we will see that the service is still created:
# Get all the services from the dashboard namespace
kubectl get all --namespace kubernetes-dashboard
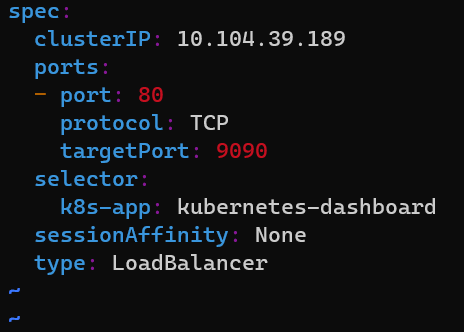
Let's edit the service and change it's type to LoadBalancer:
# Edit the Dashoard service
kubectl edit service/kubernetes-dashboard --namespace kubernetes-dashboard
# Go to the very end and remove the last 2 lines
status:
  loadBalancer: {}
# Change the type from ClusterIO to LoadBalancer
  type: LoadBalancer
# Save the file
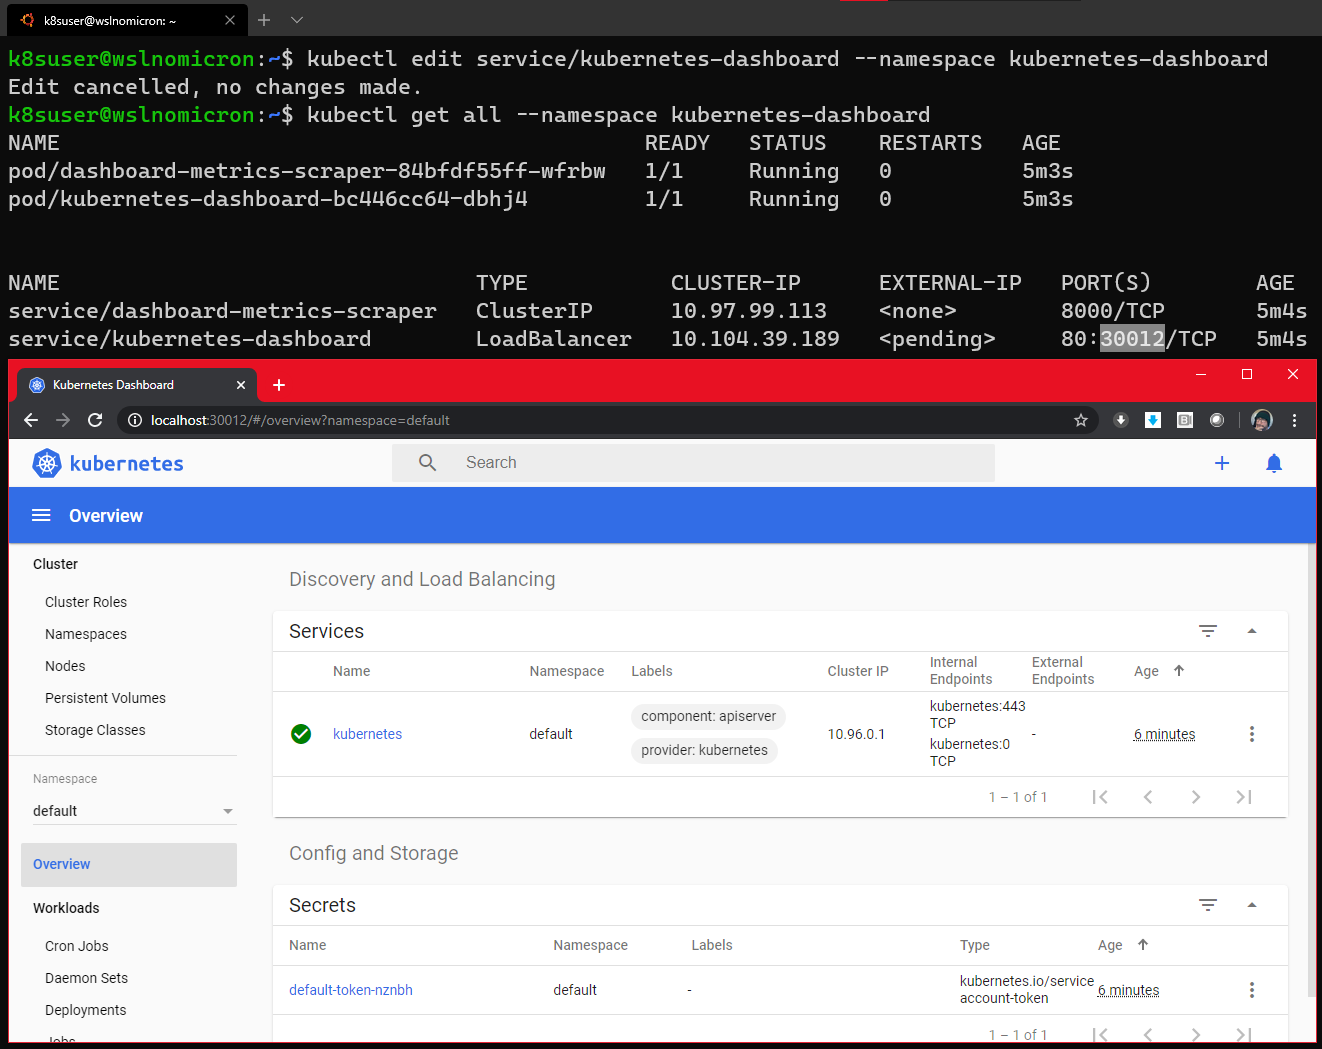
Check again the Dashboard service and let's access the Dashboard via the LoadBalancer:
# Get all the services from the dashboard namespace
kubectl get all --namespace kubernetes-dashboard
# Access the Dashboard from a browser on Windows side with the URL: localhost:<port exposed>
Conclusion
It's clear that we are far from done as we could have some LoadBalancing implemented and/or other services (storage, ingress, registry, etc...).
Concerning Minikube on WSL2, as it needed to enable SystemD, we can consider it as an intermediate level to be implemented.
So with two solutions, what could be the "best for you"? Both bring their own advantages and inconveniences, so here an overview from our point of view solely:
| Criteria | KinD | Minikube |
|---|---|---|
| Installation on WSL2 | Very Easy | Medium |
| Multi-node | Yes | No |
| Plugins | Manual install | Yes |
| Persistence | Yes, however not designed for | Yes |
| Alternatives | K3d | Microk8s |
We hope you could have a real taste of the integration between the different components: WSL2 - Docker Desktop - KinD/Minikube. And that gave you some ideas or, even better, some answers to your Kubernetes workflows with KinD and/or Minikube on Windows and WSL2.
See you soon for other adventures in the Kubernetes ocean.